In this post we are covering what a panoramic photo is, we will also look at ways to make them. First, let us define what it is. A panoramic photo, or wide format photo, is usually the combination of multiple, overlapping images, stitched together to create one larger photo.
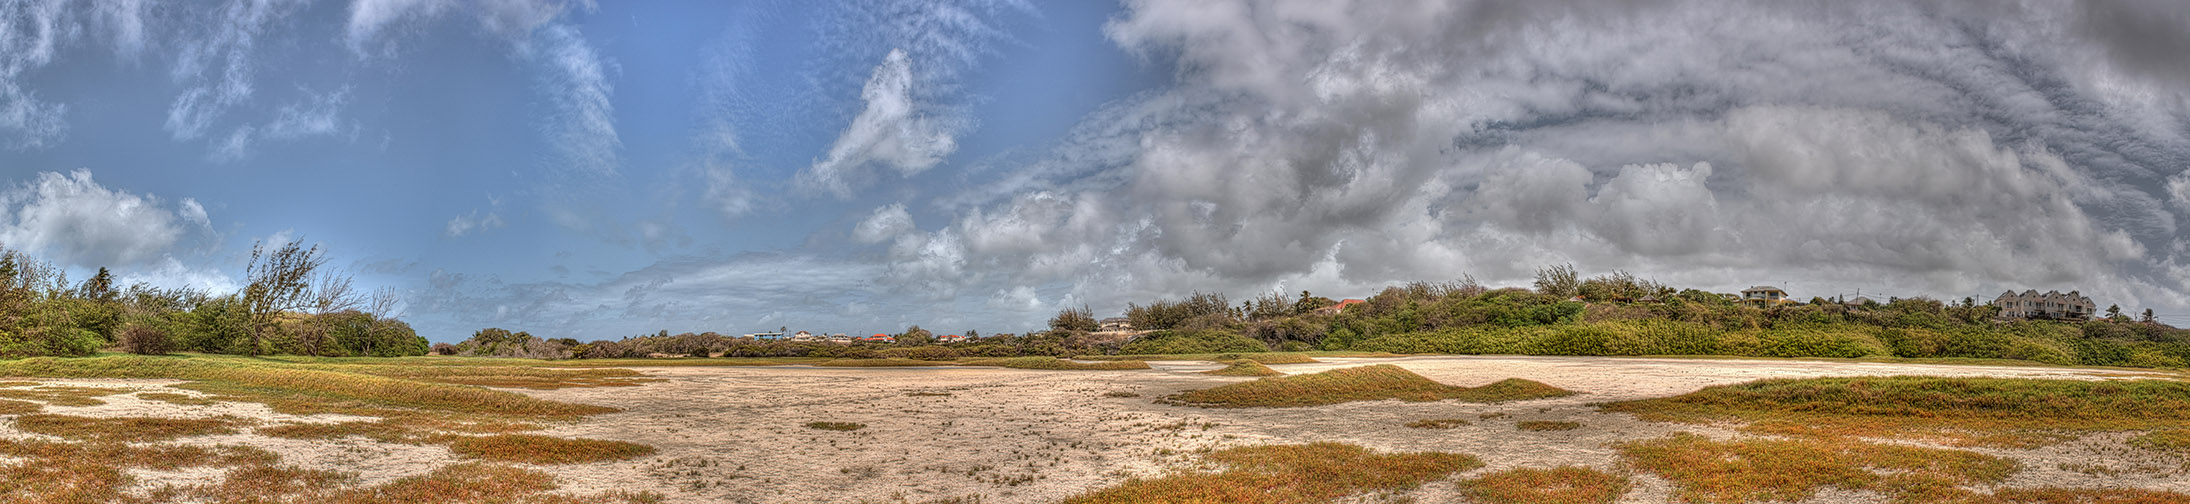
The photo above, though it is more of an example of an HDR photo (we covered HDRs in this post) it is part of a much wider image, it is a panoramic photograph made up of multiple HDR images. If you are wondering, yes it took quite a while to process. It was part of an experiment I was doing with a Nikon D200 camera. A smaller version of the full image is at the base of this post.
All panoramas are not wide, some are tall, and some may look like a normal photo (neither tall nor wide) but one they will all have in common, is they are made from multiple photos being stitched together to make one final image. Some will argue it is better to just use a lens that is wide enough to capture the entire scene, then simply crop out (cut off) the unnecessary area, leaving the slim look associated with a panorama, however, there are a few reasons why this will not always work. Let us look at a few of these reasons.
You might not be able to afford that super-wide lens. Speciality lenses can be quite expensive and if you are not going to be using them that often, you might not be inclined to spend the money on a short-term use item. You can indeed get cheaper quality lenses, but saving on cost might mean losing sharpness or clarity and introduce distortion to your images (super-wide lenses like fisheye lenses will naturally cause distortion but a cheaper lens could make that distortion worse).
Wide-angle lenses can cause distortion. If you have seen photos taken with fisheye lenses, then you would have noticed that the further away from the centre of the image you go the more the image looks like it is bulging outward. This distortion usually happens with wide-angle lenses, the wider your lens gets the more of this bulging become present. You can fix this distortion, however, it can come at the cost of not only losing pixels but sacrificing image size as well, click here for illustration.
The scene you want to capture may be wider than the lens you have can handle. While in most cases you can step back to include more of the scene, you may not always be able to move further away. Let us say you are in a clearing and directly behind you there are lots of bushes or trees, stepping back would obscure the view of your scenery, or let us say you are in the city and there is little room to move around because of the infrastructure around you. Whatever the reason a panorama would solve your limited mobility issue and allow you to capture the full scene.
Image size is a major factor. If you intend to print this image on a large scale, the last thing you want to do is reduce image size by cropping. Creating a larger format image by stitching together multiple smaller images ensures that you get a higher resolution image to work with, this means that you maintain finer detail in your final image for a sharper, crisper look.
These days there are cameras and smartphone software that allow you to make panoramic images with minimal effort, allowing you to see what your final image looks like before you leave your location.
Have a look at part two of this post, to see Tips and Tricks on how you can make creating panoramic images easier with your camera. Click Here for Part 2.